Compact/Mini Braai Instructions
The entire Compact/Mini Braai is made from 304 Stainless Steel.
Please note there might be some minor dings or light scratches on the braai because these are handmade but nothing that will prevent you from using your new awesome braai.
ALWAYS CHECK THE CURRENT CONDITIONS FROM YOUR OFFICIAL LOCAL FIRE SERVICE WEBSITE
What’s Included:
- Compact/Mini Braai
- Main Carry Bag
- Grid and Bin Bag
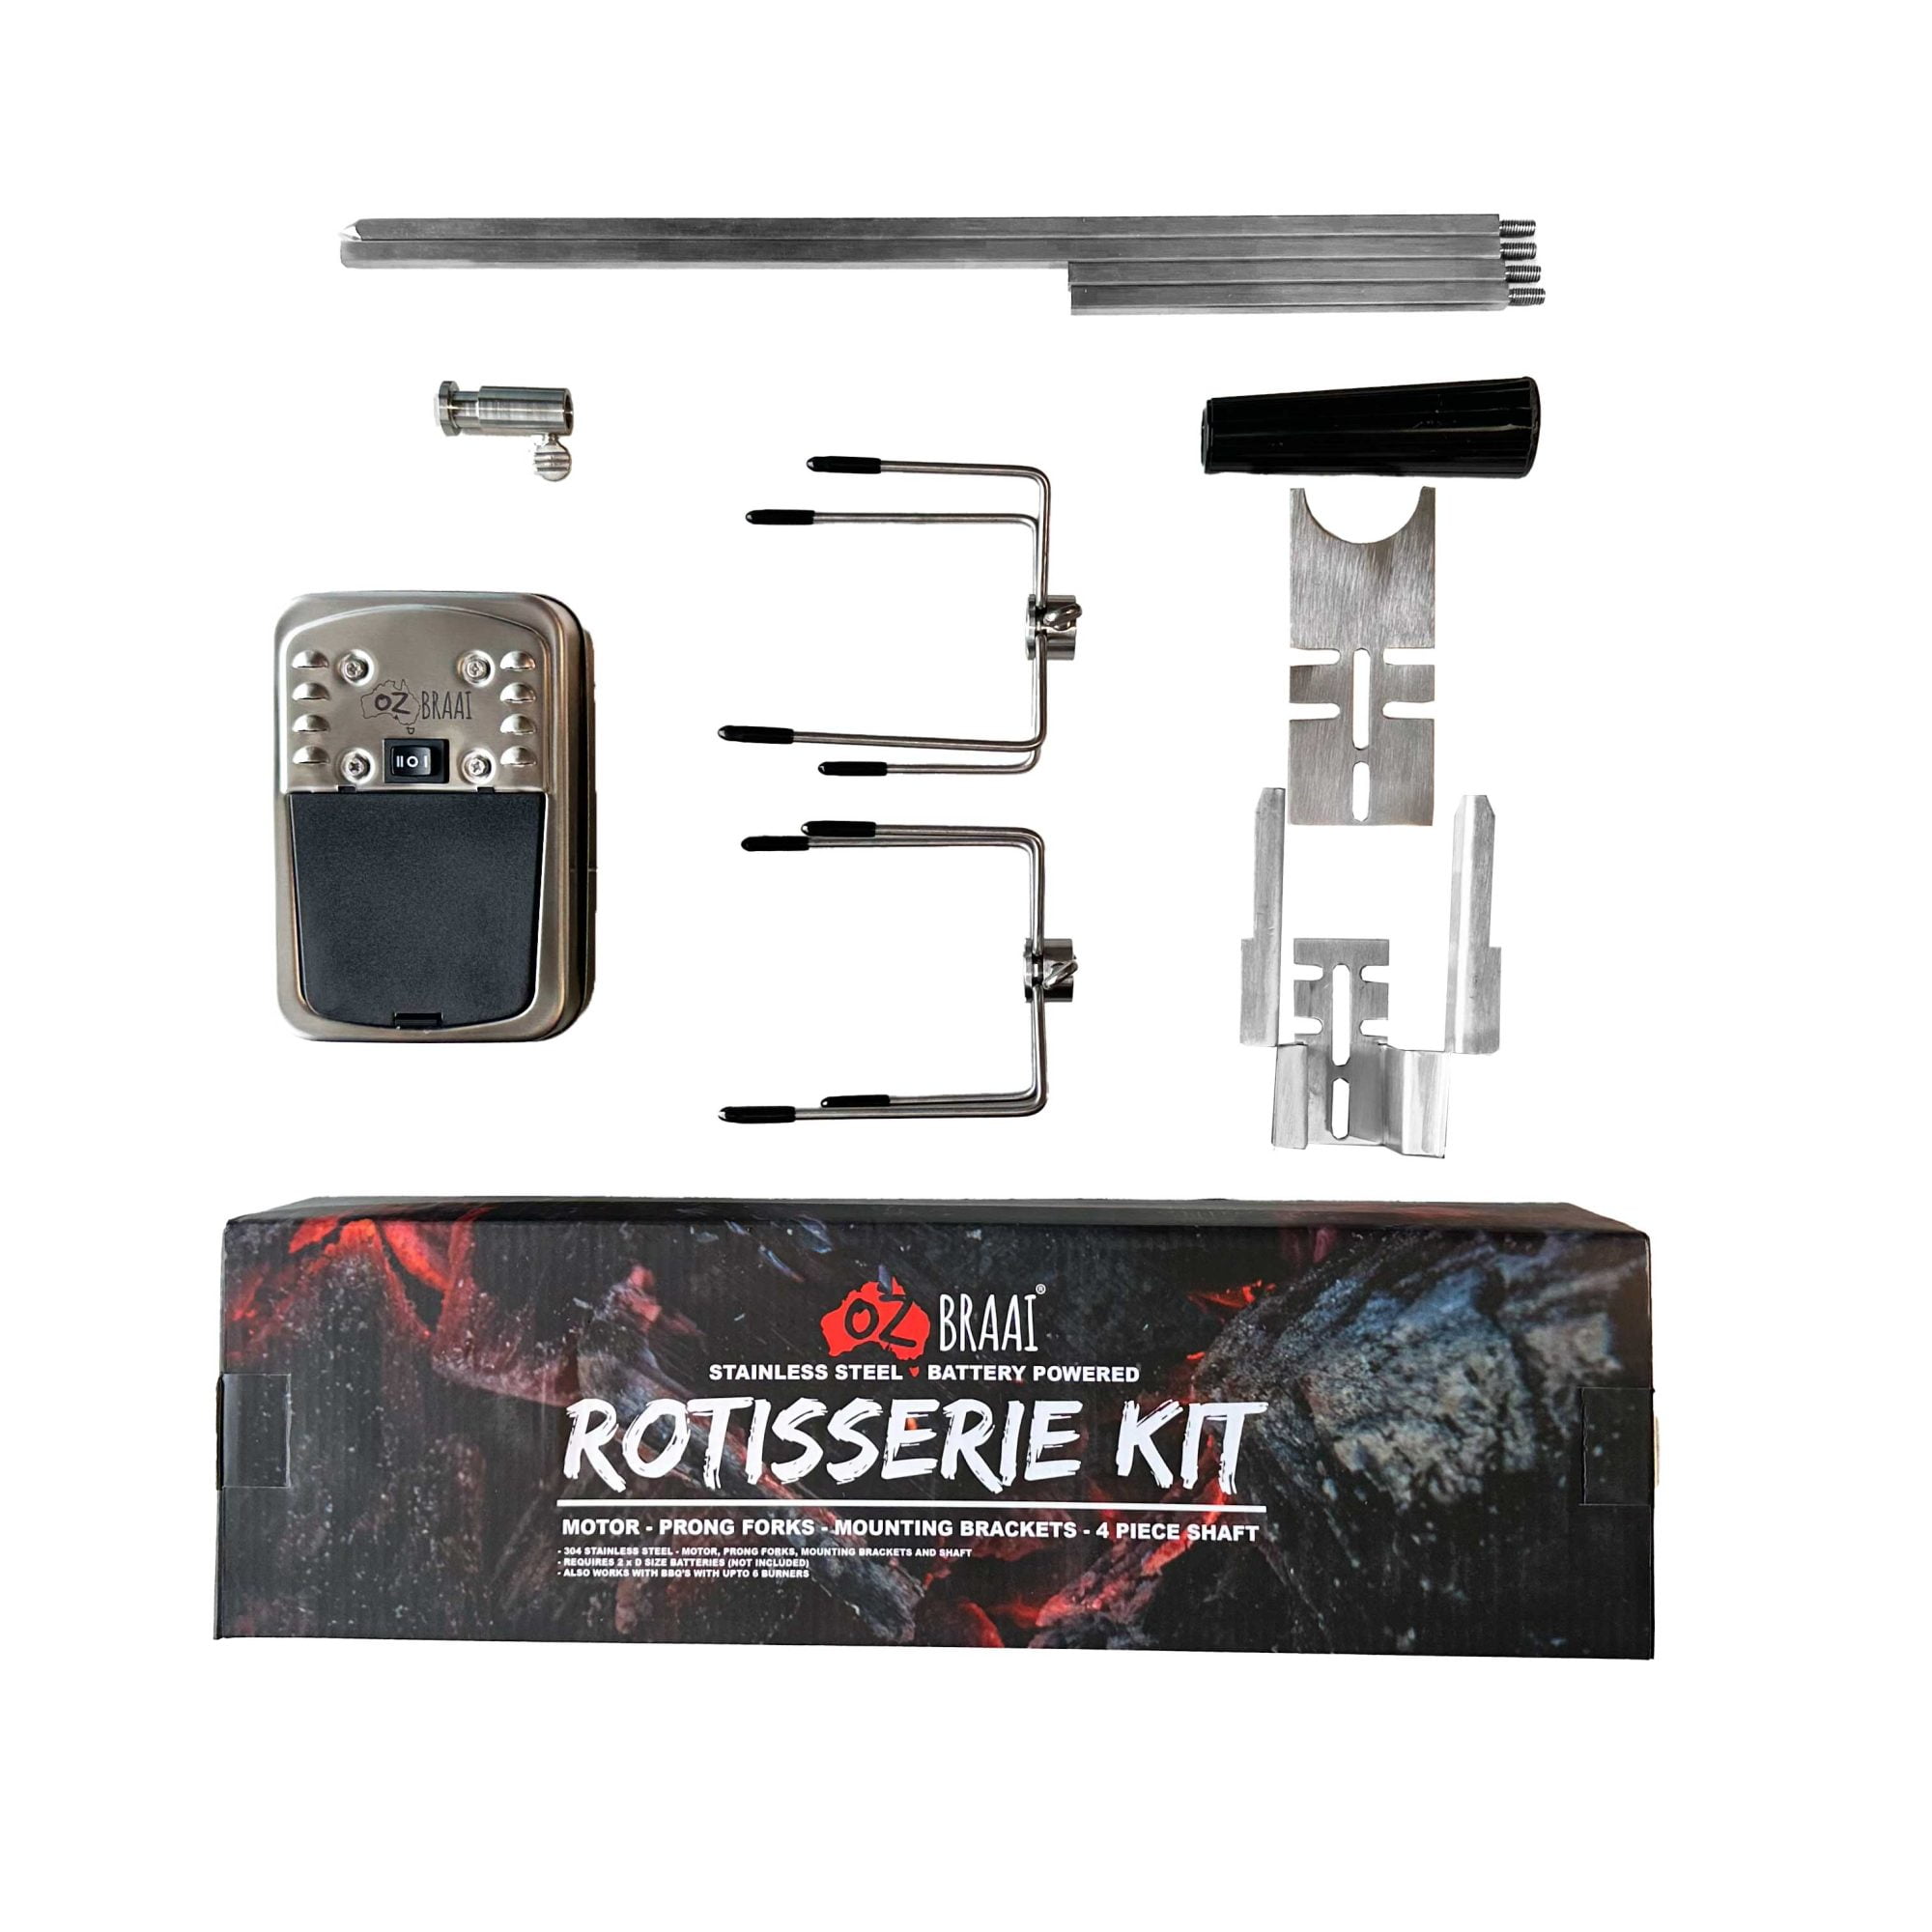
- Rotisserie Brackets
- Triangle Grid with Chains
Precautions:
- Ensure you are assembling the Compact/Mini Braai on a flat, stable surface.
- Keep children and pets away from the assembly area.
- Always check your local fire restrictions before lighting a fire.
Setting Up the Legs and Bottom Grid
Unpack: Remove all components from the box.
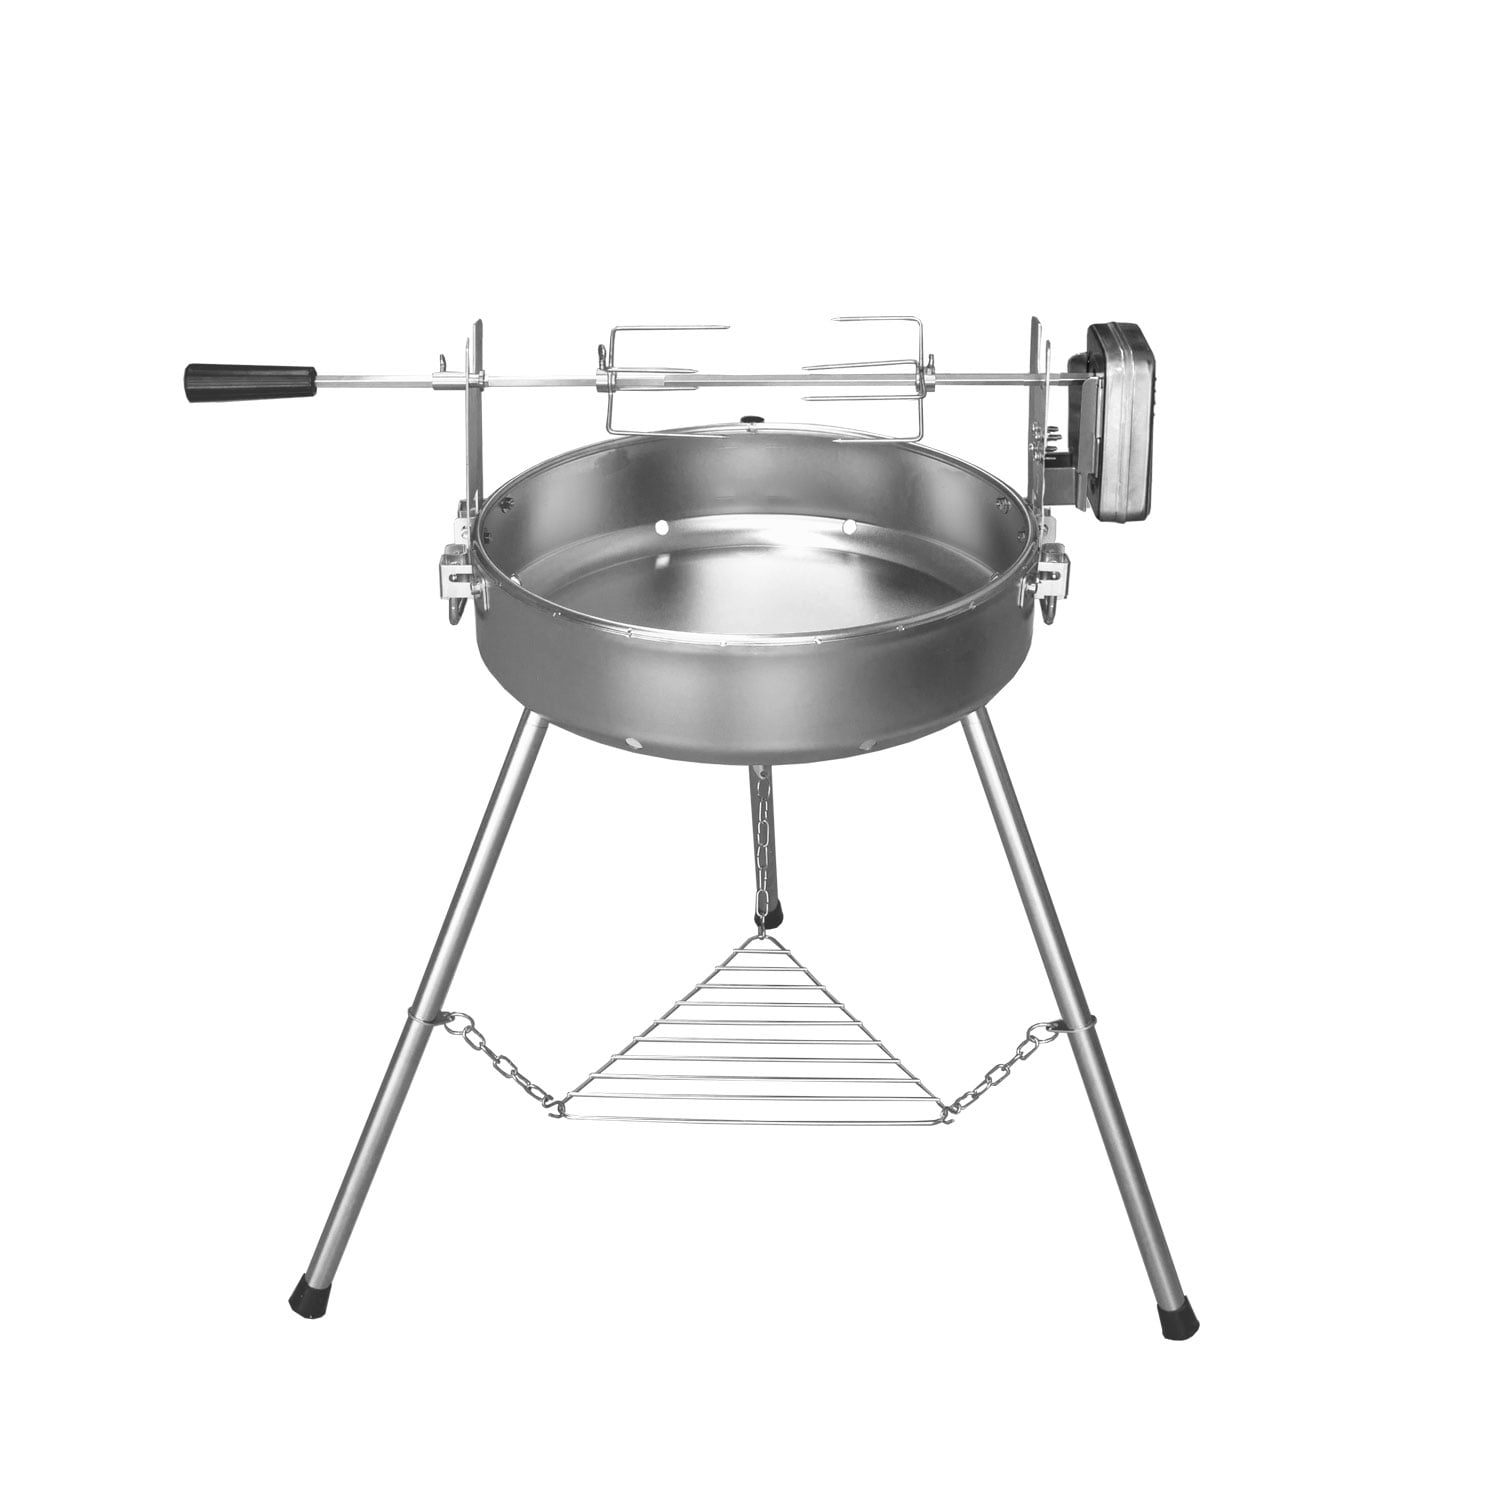
Leg Configuration: The Compact/Mini Braai comes with two leg configurations (Extension + Legs or just Legs). Choose the appropriate length before you start your fire.
Attach the Legs: Securely attach the extension legs and then the legs to the base of the Compact/Mini Braai.
Installing the Top Grid
The Compact/Mini Braai features a 500mm/400mm diameter grid with variable height adjustments. Install the grid pole to the bin and attach it with one of the butterfly nuts. Slide the grid over the pole and attach with the other butterfly nut.
Transforming into a Firepit
The Compact Braai/Mini can also transform into a fire-pit. To do this, simply remove the grid and adjust the legs to your desired height. DO NOT to change the legs once a fire has been made.
Installing Rotisserie Brackets
Locate the Handles: Find the folding handles on the Compact/Mini Braai.
Slot in the Brackets: The rotisserie brackets slot in behind the handle brackets.
Final Checks
Secure All Components: Double-check to ensure all components are securely attached.
Safety Check: Make sure the Compact/Mini Braai is stable before use.
Carry Bag Configurations:
Carry Bag WITH Bin/Grid Bag:
Your Compact/Mini Braai comes with two specially designed bags to organise and protect its components while ensuring cleanliness and convenience.
Square)Main Carry Bag:
Purpose: This is the central storage unit designed to keep all the Braai components together. Its square shape accommodates the braai’s structure and additional accessories efficiently.
Contents: It’s meant to hold the Braai’s legs, triangle and round bag.
Round Bin and Grid Bag ):
Purpose: This round bag is lined with plastic, providing a practical solution for storing the bin and grid.The lining is resistant to oil, ash, and other residues, keeping the mess contained and away from clean components.
Contents: Grid and Bin
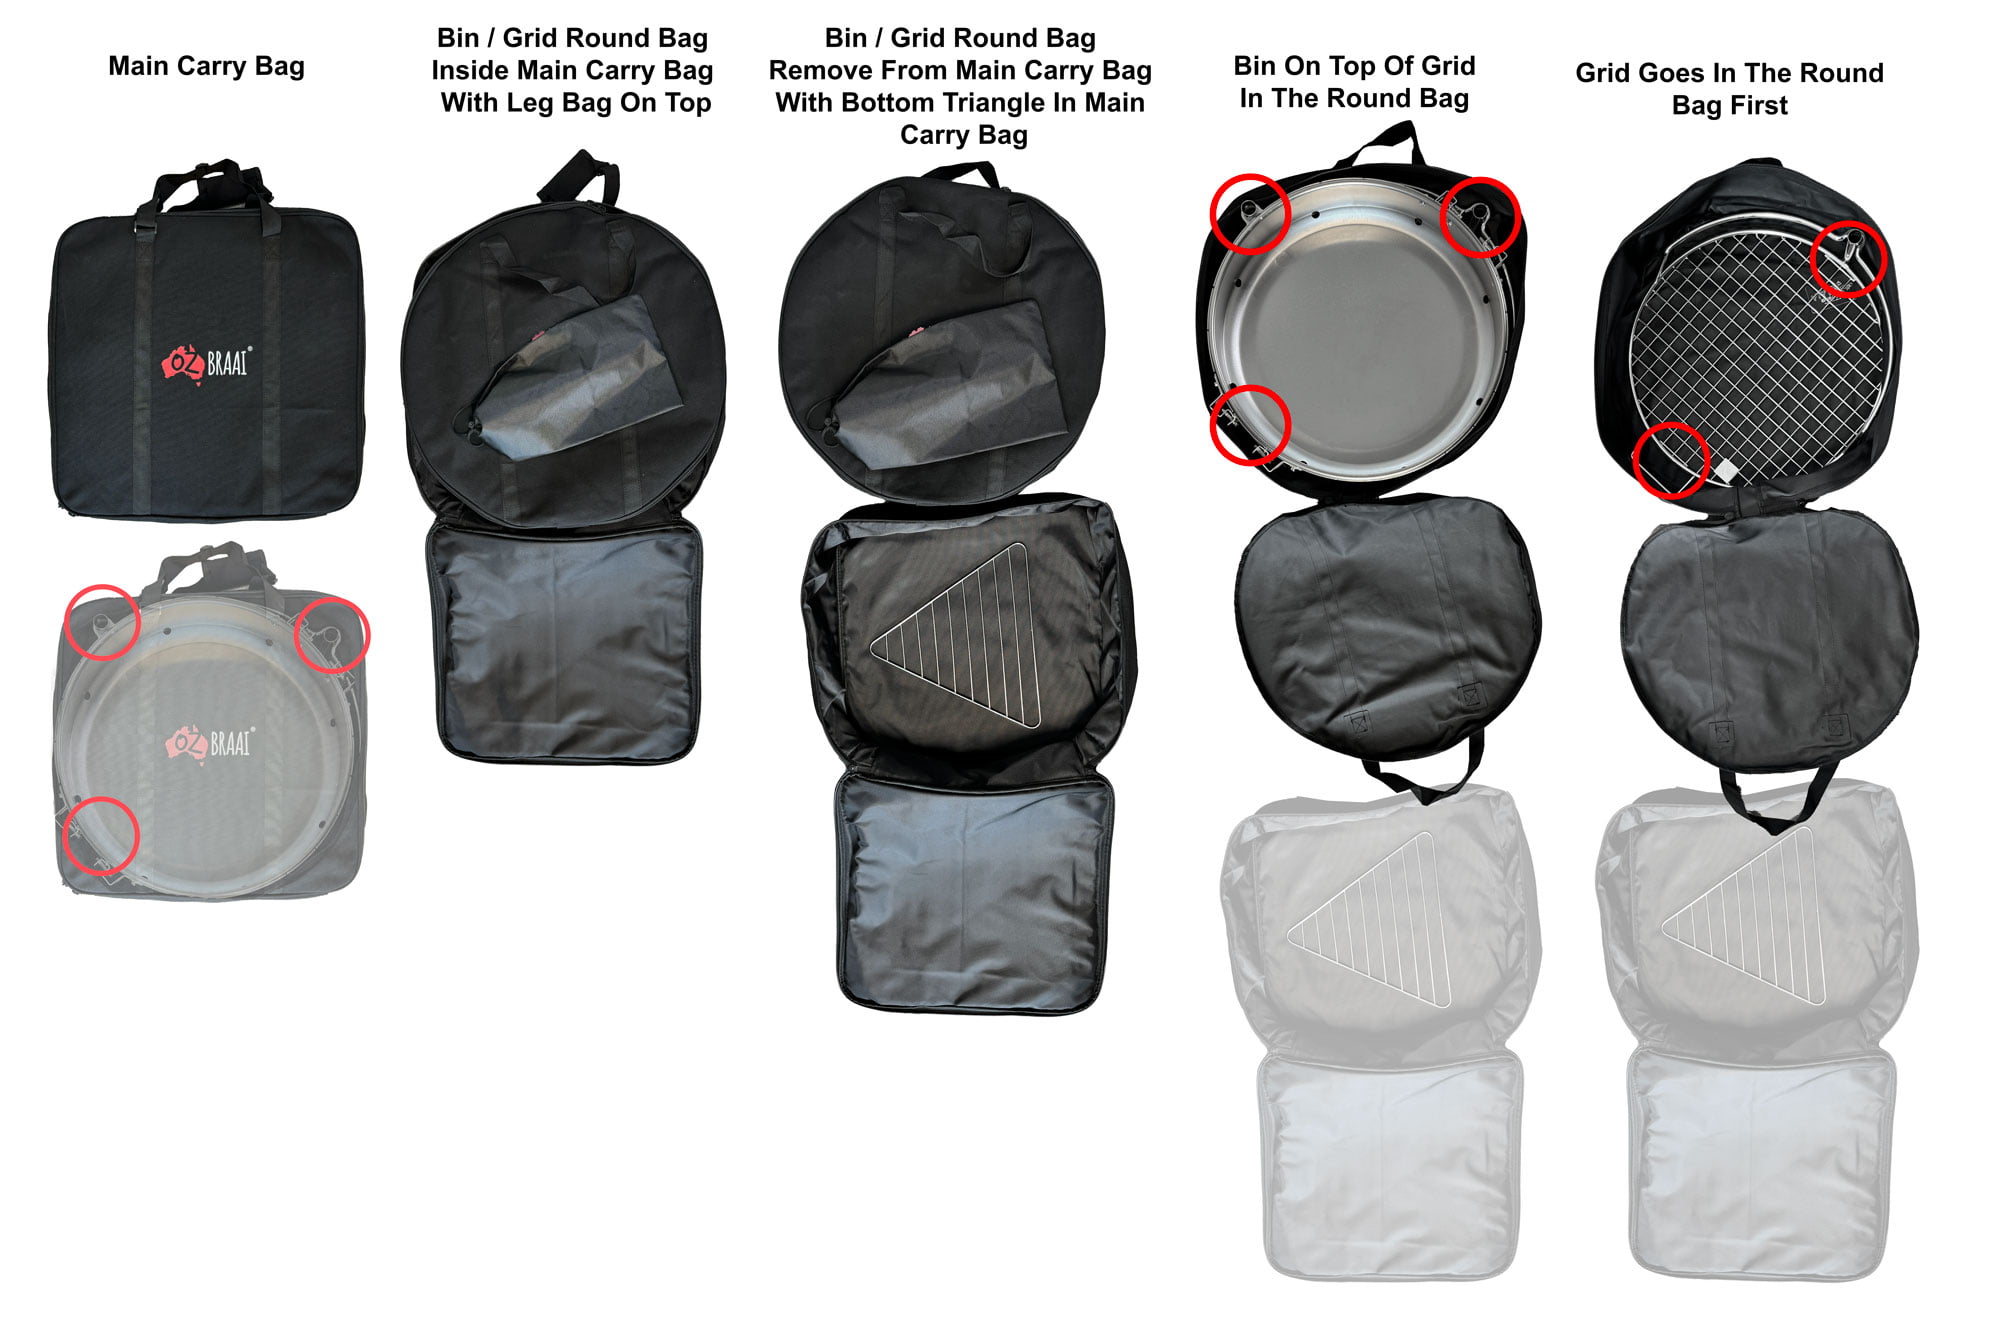
How to pack the bags
The main cary bag has a tight fit design to ensure the inside components do not move around while carrying the bag. It also keeps all all the components together. The Grid and Bin bag is designed to keep the bin and the grid seperate from the main carry bag so that it keep the main carry bag clean.
Round Bag:
Grid goes in first and then place the bin on top of the grid. Please take note of the location of the back of the bin and the grid. Although it is a round bag, It should be placed so that the back of the grid and bin each ends up in a corner of the main carry bag. This will ensure for a good fit.
Main Carry Bag:
The triangle grid goes in the bottom of the main carry bag. Place the round bag with the grid and bin inside the main carry bag. Place the legs inside the leg bag and place on top of the round bag.
Safety.
1. BEFORE YOU BRAAI
Ensure to check your Local Fire Service website to see if there are any fire dangers or bans in your local area. If it is a windy day, consider using safer fuels such as charcoal or briquettes and always ensure that you have your garden hose connected and in the proximity of the Braai.
2. DURING YOUR BRAAI
Always ensure that you have your garden hose connected and ready for use in an emergency. Do not try to extinguish any fires that pose a risk to you or your guests. For any emergencies, get to safety first and call 000.
It is important to note that the Braai and its components can get very hot. So please keep kids and adults under the influence away from the Braai. Although it is save to place items on the side racks, please note that depending on the size of your fire during your braai these spice racks may get very hot.
3. AFTER YOUR BRAAI
Always keep an eye on your fire after you have had a Braai. Before you clean or store your Braai, always ensure that the fire is out and that no hot coals are left before leaving the fire unattended.
Please use common sense when making fires. For example, do not make big open fires on windy days and always follow the recommendations of your Local Fire Service in your State or Territory.
For questions or concerns, don’t hesitate to email us at [email protected]. 12 Month Warranty: Please visit our website www.ozbraai.com.au/warranty

